
Power steering rack lines attempt uno.
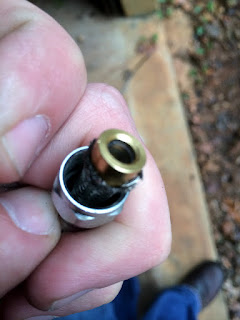

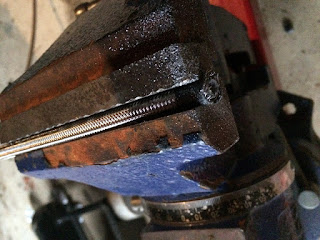
High pressure stainless fittings for PTFE lines include an inner ferrule so assembly is a little different than normal AN fittings. It isn't hard, just takes an extra step to seal. There is a inner hose end, the ferrule, and the outer end. After cutting the line with an approved utensil, the inner hose end goes on first over the stainless braid. The ferrule has an inner shoulder which sits against the nylon liner once it's assembled. the ferrule goes between the nylon liner and the outer stainless braid. This can take some maneuvering and usually involves tapping the ferrule on some wood so that the nylon liner seats.
Once the ferrule is properly situated, simply push the small portion of the outer end inside the nylon liner. It should almost pop in, and it seats completely against the ferrule. Make sure the stainless braided line has not pushed back off the ferrule. This would mean that the nylon pushed back. This has never happened to me but I have read of it occurring. Just start the AN outer end slowely so to make sure it is inside the end of the nylon before pushing. If the nylon is seated against the ferrule shoulder this should be a non issue.


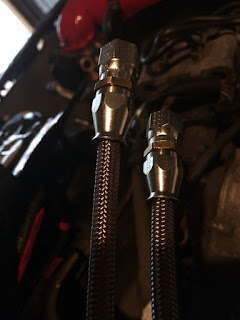
As previously stated, possibly in another entry, I simply made the lines an equal 3 feet in length.


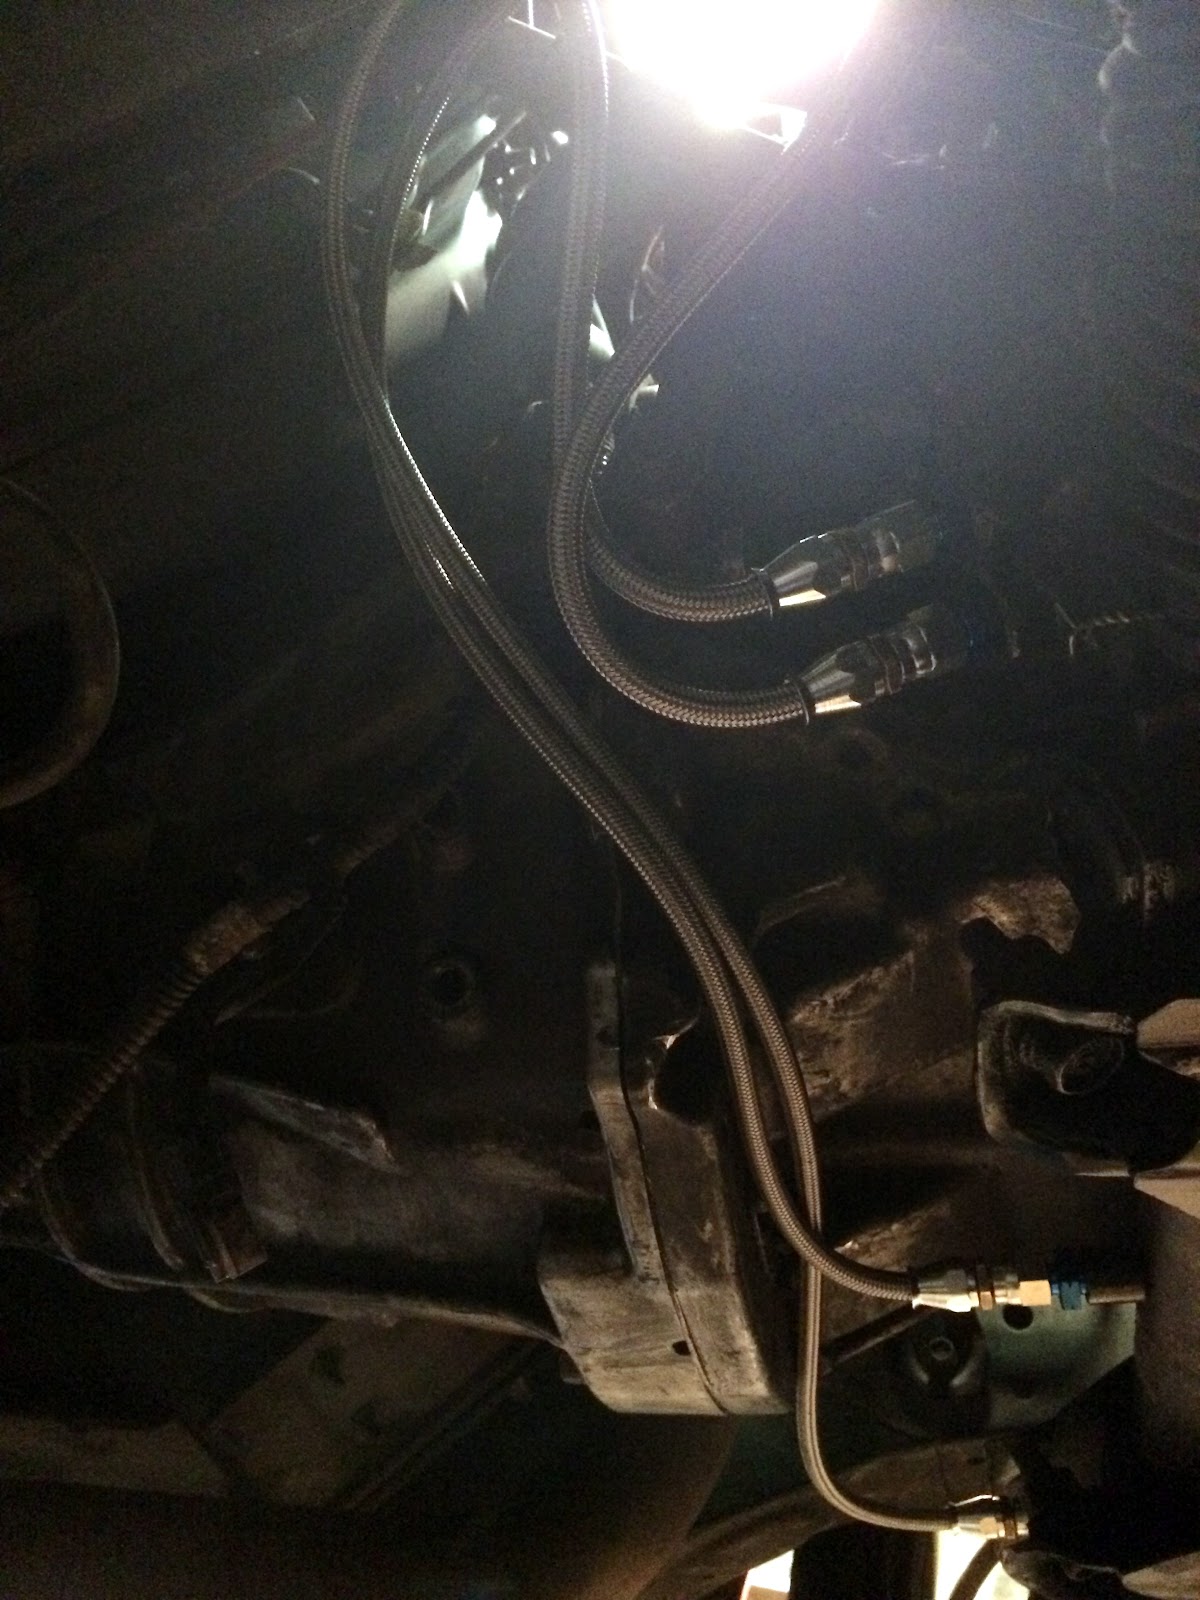
Although the lines do look very clean, people following this as a how-to need to skip to the end result as to avoid headaches, make sure to run the lines so that they do not rub against metal, including themselves. I'll get more into this later, but this may best be manifested by a sheath to protect them. Trust me on this one, you'll thank me.


Although I did not use it this time, remember to use a thread sealant such as from Russell's AN assembly kit on the threads of the metric side of the fitting. The AN side seals by design, which is why it's so brilliant.


Again, outer to outer, inner to inner.


The engine still need finishing, but this was a start...

...It was also a nice day out for the blowing of leaves.


High pressure stainless fittings for PTFE lines include an inner ferrule so assembly is a little different than normal AN fittings. It isn't hard, just takes an extra step to seal. There is a inner hose end, the ferrule, and the outer end. After cutting the line with an approved utensil, the inner hose end goes on first over the stainless braid. The ferrule has an inner shoulder which sits against the nylon liner once it's assembled. the ferrule goes between the nylon liner and the outer stainless braid. This can take some maneuvering and usually involves tapping the ferrule on some wood so that the nylon liner seats.
Once the ferrule is properly situated, simply push the small portion of the outer end inside the nylon liner. It should almost pop in, and it seats completely against the ferrule. Make sure the stainless braided line has not pushed back off the ferrule. This would mean that the nylon pushed back. This has never happened to me but I have read of it occurring. Just start the AN outer end slowely so to make sure it is inside the end of the nylon before pushing. If the nylon is seated against the ferrule shoulder this should be a non issue.


I've also read that sometimes the line will back out when you are screwing the inner hose end to the outer. I think this is assuming that the outer end has not been inserted all the way into the ferrule yet. People will say to mark the braid where the outer end is positioned against the fitting before screwing tight to see if the line moves. If the outer end is seated against the ferrule, the inner hose will be pulled towards it, locking the braided stainless inside the fitting. A marked line will show movement, but the line is not being pushed out in this case. I believe this is an instruction for assembling standard, non-ferrule type AN fittings and hose ends, where the braided line seats against the inner hose end and the outer pushes into it as your are screwing it together.


As previously stated, possibly in another entry, I simply made the lines an equal 3 feet in length.


Although the lines do look very clean, people following this as a how-to need to skip to the end result as to avoid headaches, make sure to run the lines so that they do not rub against metal, including themselves. I'll get more into this later, but this may best be manifested by a sheath to protect them. Trust me on this one, you'll thank me.


Although I did not use it this time, remember to use a thread sealant such as from Russell's AN assembly kit on the threads of the metric side of the fitting. The AN side seals by design, which is why it's so brilliant.


Again, outer to outer, inner to inner.


The engine still need finishing, but this was a start...

...It was also a nice day out for the blowing of leaves.

No comments:
Post a Comment