I spent several hours last night making another post, and here we are a few states away, and still nothing. This is the second post I've lost and it is extremely frustrating. Previously I was able to make very good use of the cache function in firefox, but not this time. I'm not making any promises it's as witty as the first, but it actually may make more sense being written in an airport during a layover than at 3am waiting for a flight that I ended up missing.


I recently uploaded 5o2 photos over 19 albums and had to upgrade to
google+ in the process. I ran out of room in my picasa account if you
can believe it. I had the option of paying 2.49 a month for 25 gigs, up
from the free 1. After some late night research I discovered that, in theory, the plus would allow me to upload unlimited photo's less than 2o48
pix on their longest side. If larger photos were uploaded it would go to
my 1 GB limit, but once at the limit any uploaded would simply be
re-sized automatically to the 2o48 pix limit.
I don't
know if it's because I'm not uploading "into google+" (whatever that
actually means) and still using picasa, or because I'm using the picasa web program
from my mac and not the website directly, but I'm again limited to 8oo
pix photos. I guess at least it's not like before when I couldn't upload any and the internet told me it needed money. Maybe it's because I'm already at my overall storage limit
and all photos are also over the individual size limit and it takes time
for google+ to update/sort/re-size. I'll look into it. Either way I was
able to upload and sort a good portion of the recent pictures, covering
work until about May. I don't care if it doesn't make sense that I could upload another few hundred at full size beyond my limit, had trouble, reset, and was able to complete the batch only to end up stuck in an entirely different hole. It's true.
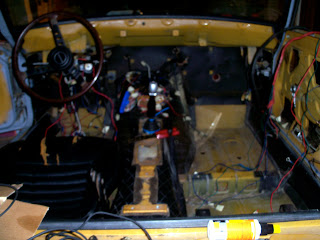


Anyone who knows me knows I don't like wiring. It's not that I can't do it. Simply wiring a car to run results in less than desirable aesthetics and sometimes functionality. A full re-wire is a large job and I did not want to begin this in the 28o due to the amount of rust in the shell itself. This was actually one of the reasons I waited until now to re-wire the car. If my goal was to have something reliable, rust AND wiring needed to be addressed.
Considering all the time and effort it would take to re-wire the car, I still chose to re-install the old wiring harness as-is in the 24o for several reasons. After a year in storage, the labels left something to be desired, and there were bad connections and knots everywhere. Getting this sorted, however, would be less of a pain than starting from scratch. Not to mention I really wanted to hear the engine turn over.
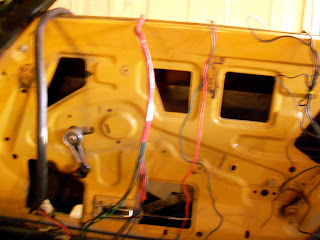
You almost have to make a test wiring harness in order to get all the
paths, mounting locations, connections, and lengths correct for your
final, good looking harness. If I were to try to start over, I would be
going backwards and at best would end up with something marginally
better than what I had, and still want to go back and re-do things. This
way I would be able to test the engine after a year of moving around,
get the paths mapped out for the wires, and have a layout to start from.
I
promise here and now that I will not drive this car long term with the
harness in this state. I do not want to continue to warn passengers not
to pull wires when they get in and out. I do not like replacing switches
that act more like fuses, replace wires that have melted, or re-tape
connects that should be soldered and heat wrapped in the middle of a
ride. That, and I really don't want to have to re-do all the research
that went into the wiring harness in the first place, trying to
determine all the pinout maps, sensor locations, and many other tap-ins
and grounds that have to be re-run from the engine harness.
No.
I want a reliable car, and the wiring is a big part of this. If I was
going to put effort into a nice, harness, it would be as meticulous as
everything else thus far on this 24o. I also did not want to repeat
work, or do work I knew would need to be redone, yet again, so the
decision was made to wire the old harness in it's entirety.
One thing I did notice after reviewing some internal relay switch schematics was that I think my power/sender wires may be connected backwards. I still haven't tested this as the car ran, but it would explain why my switches were shorting, blowing outright, and in some cases as stated previously, melting.
Yes, melting. Half of them almost immediately lost the led light that shows that they are on. If the harness was backwards it would still work, but the relays and their internal switch would effectively not be active, the switches taking the brunt of the electrical force. I'll look into this as well.
For now the battery was rested on the transmission tunnel for easy access, but in the future it will obviously be elsewhere. Keep an eye out, I promise that's going to be covered in detail somewhere in the next 2o posts.
It's difficult to take pictures of success sometimes, like turning over an engine, or something working for the first time. Wiring can be the same way, but here's a shot of the greddy 6o mm metric gauges wired and lit up like a christmas tree. You may also be able to catch the profecB light up high boost, ready and waiting.