
As you can probably guess, the s13 is next.
I checked the weather and it looked brilliant for the entire weekend.


I went outside to verify because this wasn't the norm, my neighbor got a new car of some sort that looked interesting.


Of course I would still opt for the other neighbor's car.


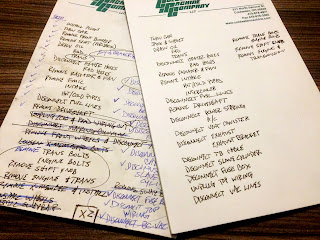
I made a new to do list, this one for the cadet, taking everything that I did which was needed on the OEM s13, removing superfluous items.
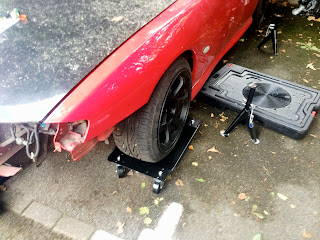
I came back outside to begin a weekend of work. The extra long jack I purchased came in very handy when jacking up the cars multiple times as it was able to reach the cross member and differentials of each car with ease from various sides. I also put the wheels dollies to use at this point and put the s14a onto them, commandeering the jack stands for the s13 project that was about to get underway.
This was a big step because once I started to prepare the cadet motor for transport I no longer had a means of transportation myself around the city. Now I say that, but around the city you don't need a means of transport as the tube, taxi's, and buses are amazing. This was just over a week before my house hunting trip to the States, and a weekend before the engines would be pulled. Things were starting to line up but everything had to happen in specific order, and on time for the next not to get held up, but this was a major event. I had all my tools on hand, groceries purchased, work from home planned, and help from mates arranged.


I was very fortunate to have my own private lot in London proper. Technically only 1 space came with my flat rental, but since this was London, not many people have cars, and many of the 30 spots were always empty. I moved the cars to the back of the lot to begin this operation, neither space were mine, and ended up taking over 3 spaces. The one where the s14a sits, the spot to its right where I dropped the 300zx pallet of parts, and the adjacent corner space which became the s13's home under the trees.


The only issue with the jack is it's a bit tall. And VERY heavy. And there is no pin to hold the handle in place. And its not a quick raise pump...


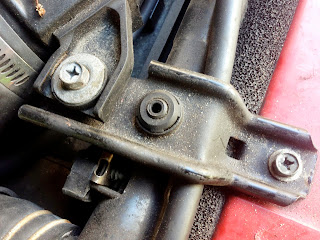
I had to remove the jack plate in order for it to clear under the center of the crossmember of the OEM height s13. I don't remember how I got it to clear on the s14. I know the bumper was already removed and I recall it barely clearing under the front radiator support, but maybe I removed the jack plate earlier as well.
This s13 is a virgin.
Nobody has touched this car. It even has a factory engine splash guard still installed. This did worry me slightly about the ease of disassembly I would encounter. The s14a has been lightly modified and worked on a bit, which means factory panels have been replaced or removed entirely, as well as hardware being touched since birth. These bolts had obviously never seen a wrench since it left Japan, and that could be challenging on a 20 year old car ... not that I'm complaining in the least.


Plan was to prep this engine identically to the other, such that the following weekend all that was needed was to drop the trans mount, unbolt the engine mounts, and raise the engine out of the car.


And just like the first motor, we begin by draining the engine oil into the same drain pan as before.


Instead of retreating to the top of the motor just yet, I wanted to drain all the fluids first, so I began removal of the engine splash guard.
I believe every single bolt head broke off in the socket.


Now onto the lower radiator hose.


Aaaaand it broke off as well.
This was a great start, but after 10 minutes of fighting with the OEM style band clamp I pried it off the hose and was able to drain the radiator fluids.


There was a little spillage. I also drained the transmission gear oil at this time. This drain pan is amazing. Did I mention how unhappy I am for having to leave it behind?


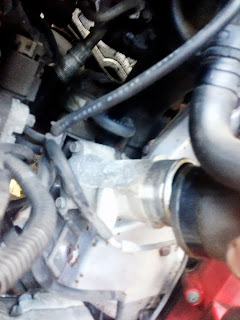
This time I started by removing the radiator mounts and tubing above it, which was one of the intake crossover tubes to the OEM sidemount intercooler behind the side of the front valence.


I used baggies with sharpie labels during the sr20 disassembly, as well as the cadet. It makes reassembly much easier when you don't remember what the bolts look like exactly and you have many to chose from. Connecting electrical plugs and vacuum hoses is usually a bit easier than bolting hardware sans identification.


Actually I lied already, I started as I did on the sr20 motor, with the intake tubing on the turbo side.


I then moved onto the intake directly at the turbo joint, now that it was much more accessible with the upper tube out of the way.


This involved mapping out vacuum lines again, except these are all there and intact to the OEM locations, using the OEM clips and guides.


I had a set of 4 pliers at my disposal, all of which were used in some form or fashion during disassembly of this very factory motor. I still can't get over it. It's an s13 for god sake.


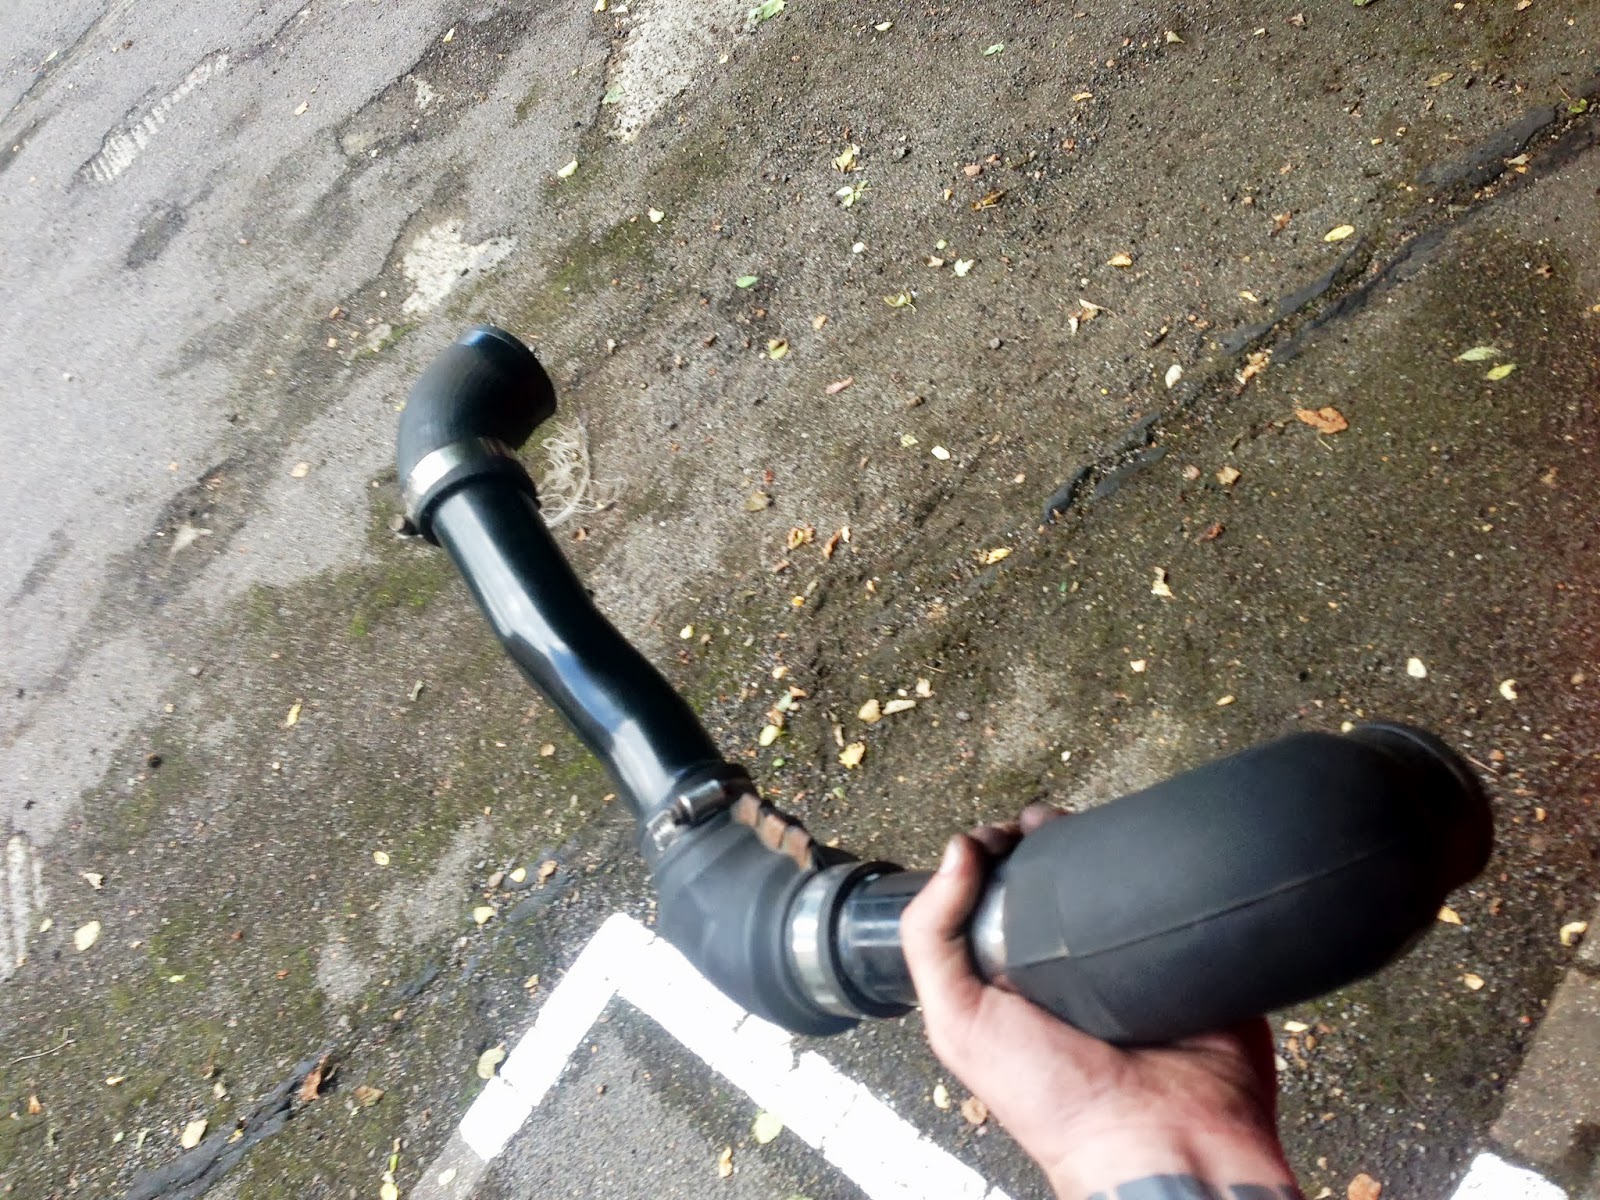
Finally the intake filter box and tube were removed from the car and it freed up a lot of space in that corner to work.


Success!
Now onto the other intake tube connections stepping down the line.

Next to be removed completely was the turbo to intercooler tube.


And then the intercooler to throttle body tube.


Once these tubes were off, it was looking much further along than on the sr20 at this point, probably due to the amount of space and coverage these tubes provide /occupy in the factory engine bay.
This was my morning.

I checked the weather and it looked brilliant for the entire weekend.


I went outside to verify because this wasn't the norm, my neighbor got a new car of some sort that looked interesting.


Of course I would still opt for the other neighbor's car.

I still didn't quite believe so I check the weather again for the PM, and it was even better.

I made a new to do list, this one for the cadet, taking everything that I did which was needed on the OEM s13, removing superfluous items.

I came back outside to begin a weekend of work. The extra long jack I purchased came in very handy when jacking up the cars multiple times as it was able to reach the cross member and differentials of each car with ease from various sides. I also put the wheels dollies to use at this point and put the s14a onto them, commandeering the jack stands for the s13 project that was about to get underway.
This was a big step because once I started to prepare the cadet motor for transport I no longer had a means of transportation myself around the city. Now I say that, but around the city you don't need a means of transport as the tube, taxi's, and buses are amazing. This was just over a week before my house hunting trip to the States, and a weekend before the engines would be pulled. Things were starting to line up but everything had to happen in specific order, and on time for the next not to get held up, but this was a major event. I had all my tools on hand, groceries purchased, work from home planned, and help from mates arranged.


I was very fortunate to have my own private lot in London proper. Technically only 1 space came with my flat rental, but since this was London, not many people have cars, and many of the 30 spots were always empty. I moved the cars to the back of the lot to begin this operation, neither space were mine, and ended up taking over 3 spaces. The one where the s14a sits, the spot to its right where I dropped the 300zx pallet of parts, and the adjacent corner space which became the s13's home under the trees.


The only issue with the jack is it's a bit tall. And VERY heavy. And there is no pin to hold the handle in place. And its not a quick raise pump...

I had to remove the jack plate in order for it to clear under the center of the crossmember of the OEM height s13. I don't remember how I got it to clear on the s14. I know the bumper was already removed and I recall it barely clearing under the front radiator support, but maybe I removed the jack plate earlier as well.
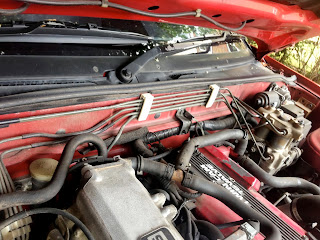
This s13 is a virgin.
Nobody has touched this car. It even has a factory engine splash guard still installed. This did worry me slightly about the ease of disassembly I would encounter. The s14a has been lightly modified and worked on a bit, which means factory panels have been replaced or removed entirely, as well as hardware being touched since birth. These bolts had obviously never seen a wrench since it left Japan, and that could be challenging on a 20 year old car ... not that I'm complaining in the least.


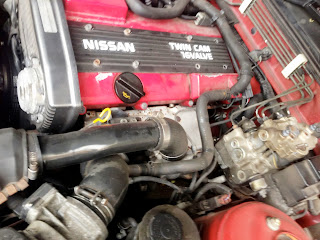
Plan was to prep this engine identically to the other, such that the following weekend all that was needed was to drop the trans mount, unbolt the engine mounts, and raise the engine out of the car.


And just like the first motor, we begin by draining the engine oil into the same drain pan as before.


Instead of retreating to the top of the motor just yet, I wanted to drain all the fluids first, so I began removal of the engine splash guard.
I believe every single bolt head broke off in the socket.


Now onto the lower radiator hose.


Aaaaand it broke off as well.
This was a great start, but after 10 minutes of fighting with the OEM style band clamp I pried it off the hose and was able to drain the radiator fluids.


There was a little spillage. I also drained the transmission gear oil at this time. This drain pan is amazing. Did I mention how unhappy I am for having to leave it behind?


This time I started by removing the radiator mounts and tubing above it, which was one of the intake crossover tubes to the OEM sidemount intercooler behind the side of the front valence.


I used baggies with sharpie labels during the sr20 disassembly, as well as the cadet. It makes reassembly much easier when you don't remember what the bolts look like exactly and you have many to chose from. Connecting electrical plugs and vacuum hoses is usually a bit easier than bolting hardware sans identification.


Actually I lied already, I started as I did on the sr20 motor, with the intake tubing on the turbo side.


I then moved onto the intake directly at the turbo joint, now that it was much more accessible with the upper tube out of the way.


This involved mapping out vacuum lines again, except these are all there and intact to the OEM locations, using the OEM clips and guides.


I had a set of 4 pliers at my disposal, all of which were used in some form or fashion during disassembly of this very factory motor. I still can't get over it. It's an s13 for god sake.


Finally the intake filter box and tube were removed from the car and it freed up a lot of space in that corner to work.


Success!
Now onto the other intake tube connections stepping down the line.

Next to be removed completely was the turbo to intercooler tube.


And then the intercooler to throttle body tube.


Once these tubes were off, it was looking much further along than on the sr20 at this point, probably due to the amount of space and coverage these tubes provide /occupy in the factory engine bay.
This was my morning.

No comments:
Post a Comment