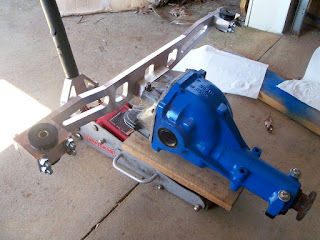
Install the drop mounts and suspension columns first with the RLCAs attached. Get all the bushing greasing out of the way as well, you don't want to have to stop and have to do this in the middle of the installation.
After assembling the rear differential mustache bar spacer, blocks, and bushings, grease the tops of the bushings and stick the correct washers on top. I say correct because the Techno Toy Tuning kit comes with washers with different hole id's machined into them because of the OEM stud design that the bushing fits around. The Suspension Techniques kit has 4 washers that go on either end of the mustache bar bushings, but they all have the same id hole size so that you can't get it mixed up. This sacrifices some fitment for ease of install, but it would have been nice to know this difference ahead of time as the smaller id washers will not fit on the top of the bushing.
Remove differential, swap washers, and try again.
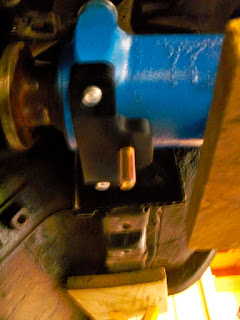
This is what I was referring to in a previous entry about the front differential mount having to be inverted in a 24o z application. This was shot after some very unhappy moments when I realized after all that work of preparing the parts for installation I would have to remove the mount while the diff was installed in the car only to re-install it yet again. Notice how the differential cradle bolt holes line up with the solid differential center mount with it facing backwards.
Unlike popular belief, 28o zxt cv half shafts are not identical. From my research, the driver side is the shorter one. I currently have a leak from this side, so I'm wondering if they're in backwards or maybe the seal needs to be replaced on the differential. The websites I found on the subject used the words left and right side, however, not driver side and passenger side. I will get into this later as after all of this work I really don't want to uninstall the differential if I don't have to.
The suspension columns are short enough now that they can be unbolted from top shock nut and lowered outward, clearing the fender, without taking off the RLCAs. I did this and then installed the half shafts from under the car. It was difficult to get them to seat all the way, which may be why one is currently leaking even without any fluid in the differential. Although odd, I can not question reality.
Take a deep breath - almost there!
Make sure to locktite everything, including the CV half shaft companion flange bolts. Again, make sure to go back and tighten all the bolts you had to loosen in order for the full set to line up properly. It was difficult getting the bushings positioned in the bushing races in the front without going back and loosening the rear drop mounts so that the whole assembly could flex a bit. I know I've said this a few times now, but there's a reason.
Lastly, install the bushing cap bolts on all 4 ends after cleaning them really well in the kitchen before/during/after dinner to the dismay of anyone present.
Come back the next day after relaxing a bit and take some final pictures.
And while you are too exhausted to work on the car again, spend some time cleaning the garage.


Looking sharp man
ReplyDeleteThanks! I keep checking your site for updates, how's the project coming??
ReplyDelete