


The new Techno Toy Tuning RLCAs look great with the new hardware, including machined "spindle pin" bolts. I really like the spherical bearing. I know the Arizona Z Car RLCA's also have them on the inside pickup points, but they are also 2x more expensive.
I took the quiet opportunity home alone to grease the polyurethane bushings, as I'm sure it would be more of a pain to try to do this, while keeping them as clean, under the car on my back in the middle of the night. Some of the bushings had grease channels, where I placed the grease initially before spreading it all over the surface. The grease is supposed to go between the black bushing and any metal contact - so between it and the brass sleeve, between it and the car, or between it's shoulders and the faces of suspension components. I also greased the faces between the 2 bushings. The ID of the inner brass sleeve will be installed over the RLCAs and is left dry as it's not supposed to rotate around the control arm.


Lots of new bushings. I have more than several that were installed on the OEM suspension of the 24o z that have never seen the road. Good back-ups, or if anyone wants to replace certain bushes, let me know.
Q-tips with the fuzzy ends cut off are good grease applicators. Be careful, as this lithium grease does not come out very easily, and is even harder to wash off hands.


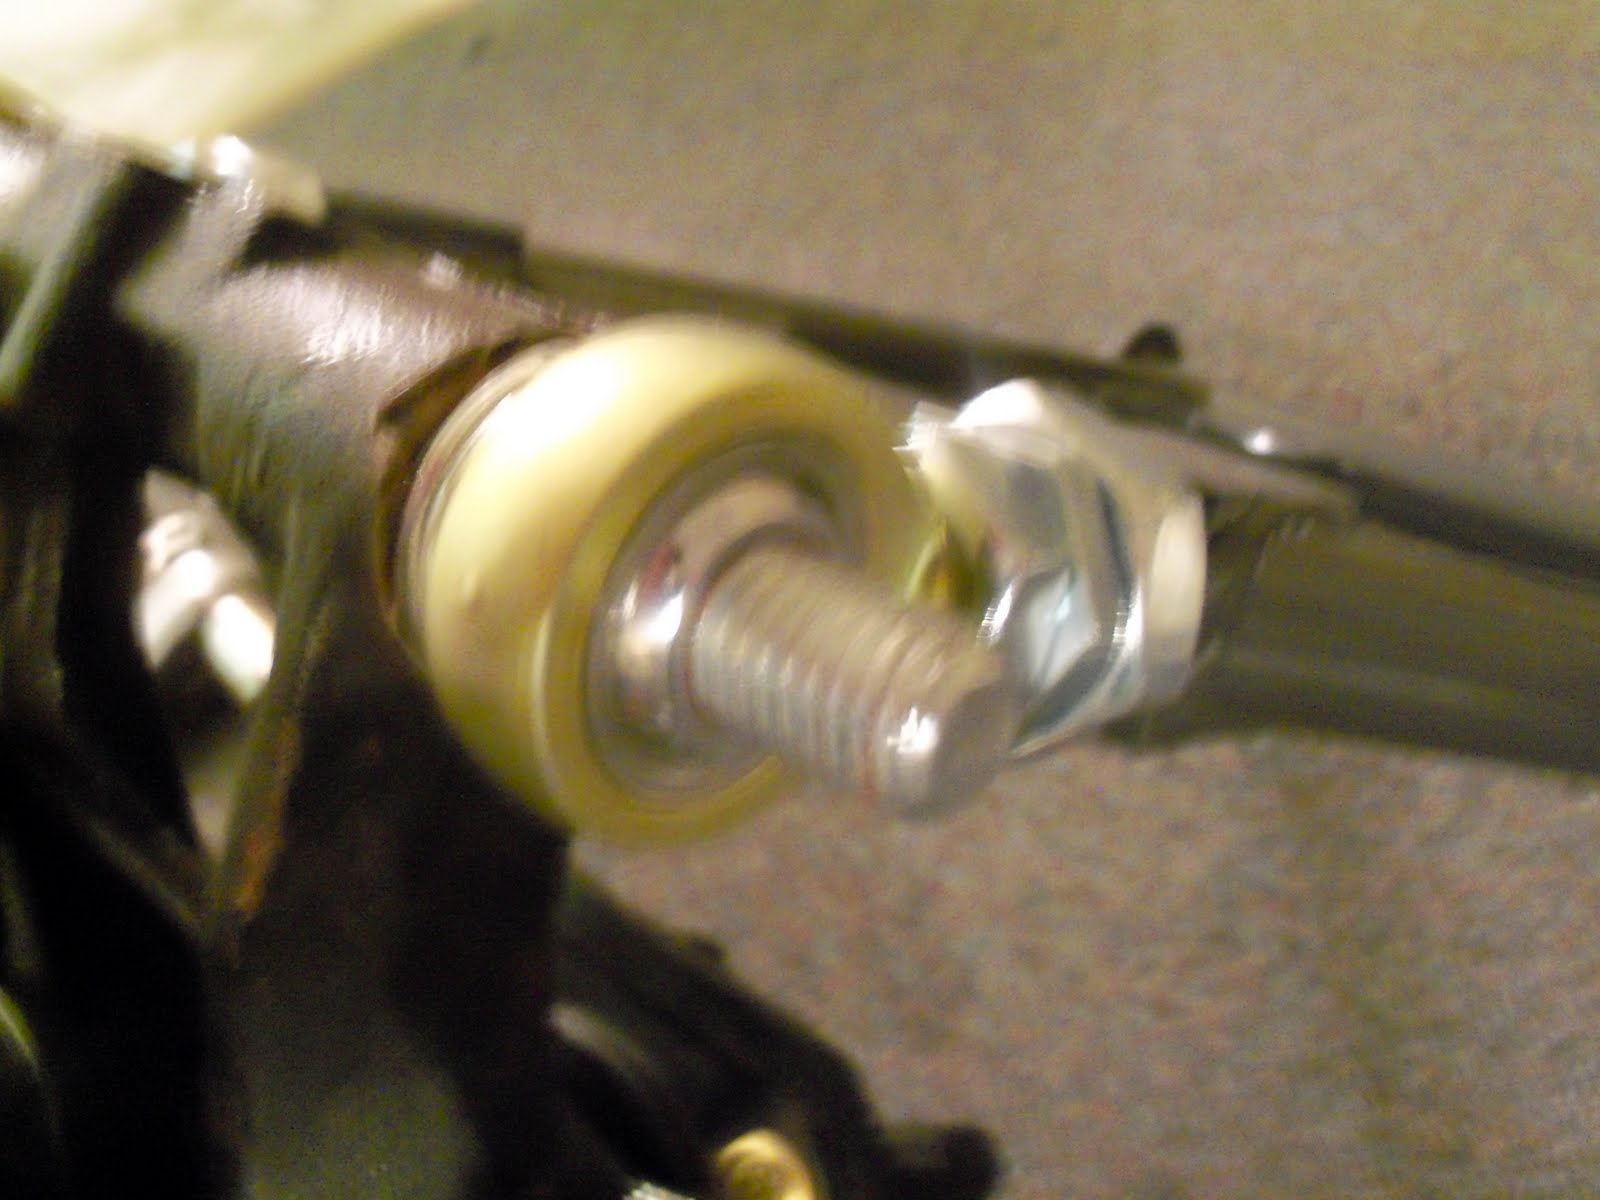
Spindle pin bolt test fit. Looks great. The kit came with sized washers that can be placed between the suspension column and the bearings forward or aft, hence the current gap. This accurately places the wheel in the wheel well if you had any inclination to adjust it.


These are the mounting blocks that came with the Techno Toy Tuning mustache bar. Although they were bored out in the "center", there is still a runout and a high/low side with regards to thickness because of the true position of the bore. The blocks were seemingly cut from the same stock that was bored as one earlier, and then marked high/low to identify their symmetric dimensions to be installed in the same directions later. I'm impressed.


I greased the OD of the sleeves and the ID of the bushings, including the inside shoulders. During installation I would grease the OD faces that would be in contact with the washers on the bolts which would hold them. I tried pushing the bushings in place but there this is a slip fit, if not an interference fit, here as well. That and I think the air was being compressed on the inside, and not having anywhere to go, would simply push the bush back out a bit after all my efforts. I would deal with this later.


I cleaned out the suspension columns very well before installing the new spindle pin bolt.


I refuse a repeat of the first 28o z, or second 24o z, spindle pin debacles, so I coated ample amounts of nice copper anti-seize all over the bolt. There was some overflow during a test fitting, but to my surprise the anti-seize stayed on. It's almost as if it seeped into the material. Either way, it's not going anywhere and seems to be up to the job. Just like the bushing grease, watch out where this stuff goes, it's almost a liquid powder and is hard to wash off, and even harder to get the smell, or taste for that matter, out.


As a side note, for every good picture I usually take 3 or 4 bad ones. This is very discouraging, but I'm in the market for a better camera. The one I'm using is of the standard point and shoot variety but doesn't have the greatest low light, close up, or focus capabilities.


I measured the washer stack and divided them into just about even pairs, installing them matched on either side so that assuming the shell is also perfect, the wheels would sit in identical positions. It's such a machined fit that one washer didn't fit inside the stack-up on both columns. I put this one between the spherical bushing and the end nut.
Of course the shell is perfect.


As per the usual progression in most of these suspension entries, do it all again on the other side.


I decided since I was at it I would replace the old e-brake bracket bolts as well. All the other hardware is new, why stop right before the finish line. I'm pretty sure with the new setup these brackets won't even be used, but that's besides the point.


No comments:
Post a Comment