
You save yourself from dragging a few hundred pounds of, in some cases, top end suspension components across the less than smooth garage floor that you don't want to make rougher. You save yourself from having to turn and wiggle a very awkward assembly of parts out from under a car that is undoubtedly not high enough off the ground when first attempted. You save yourself from having to use your non-existent go-go-gadget arms to catch multiple things from falling at the same time, namely the suspension towers rotating outward as the assembly is lowered.
All in all, you save yourself a headache. With that said, I've done this many different ways for an even greater number of reasons. Sometimes certain parts need replacing while others can stay and sometimes parts need only be unbolted, not removed from the car. Whatever the reason, be careful you don't take something out that is supporting 5 other things that you forgot to weigh. The assembly might be heavy.

1. assess your work environment and gather tools you may or may not need.

2. general cleanliness and organization should be high on priority list.

3. luckily, the car is already jacked up, supported by stands on the front cross member and rear sub-frame.

4. remove lung nuts on passenger rear wheel, note the short oem wheel studs, both of which are to be replaced.

5. remove passenger rear wheel.

6. repeat on the driver side in the same manor and push it, and the passenger wheel for that matter, out of the action to a relatively safe place.

7. unluckily, get discouraged when you notice the exhaust still hasn't fixed itself and is still on the jack where you left it weeks ago.

8. <sigh> and take pictures because you don't really want to start working.

9. once-over your coilover install and get encouraged, remembering that you need to do this to get back on the road.

1o. find the first thing in the way, the exhaust, and take a picture of how it is blocking the removal of the differential assembly.

11. remove the exhaust, to be fixed.

12. entire rear assembly to be removed for various reasons possibly to be explained later or in bold throughout this entry.

13. a blue Easter egg in a sea of mounts, every one of which also supports another part from falling, rotating, or both.

14. start removing bolts, namely on the driver side outboard cv axle to companion flange.

15. there are (6), keep them together in a relatively safe place.

16. repeat on the passenger side.

17. hero shot, note the relative safeness of the place in which they currently reside.

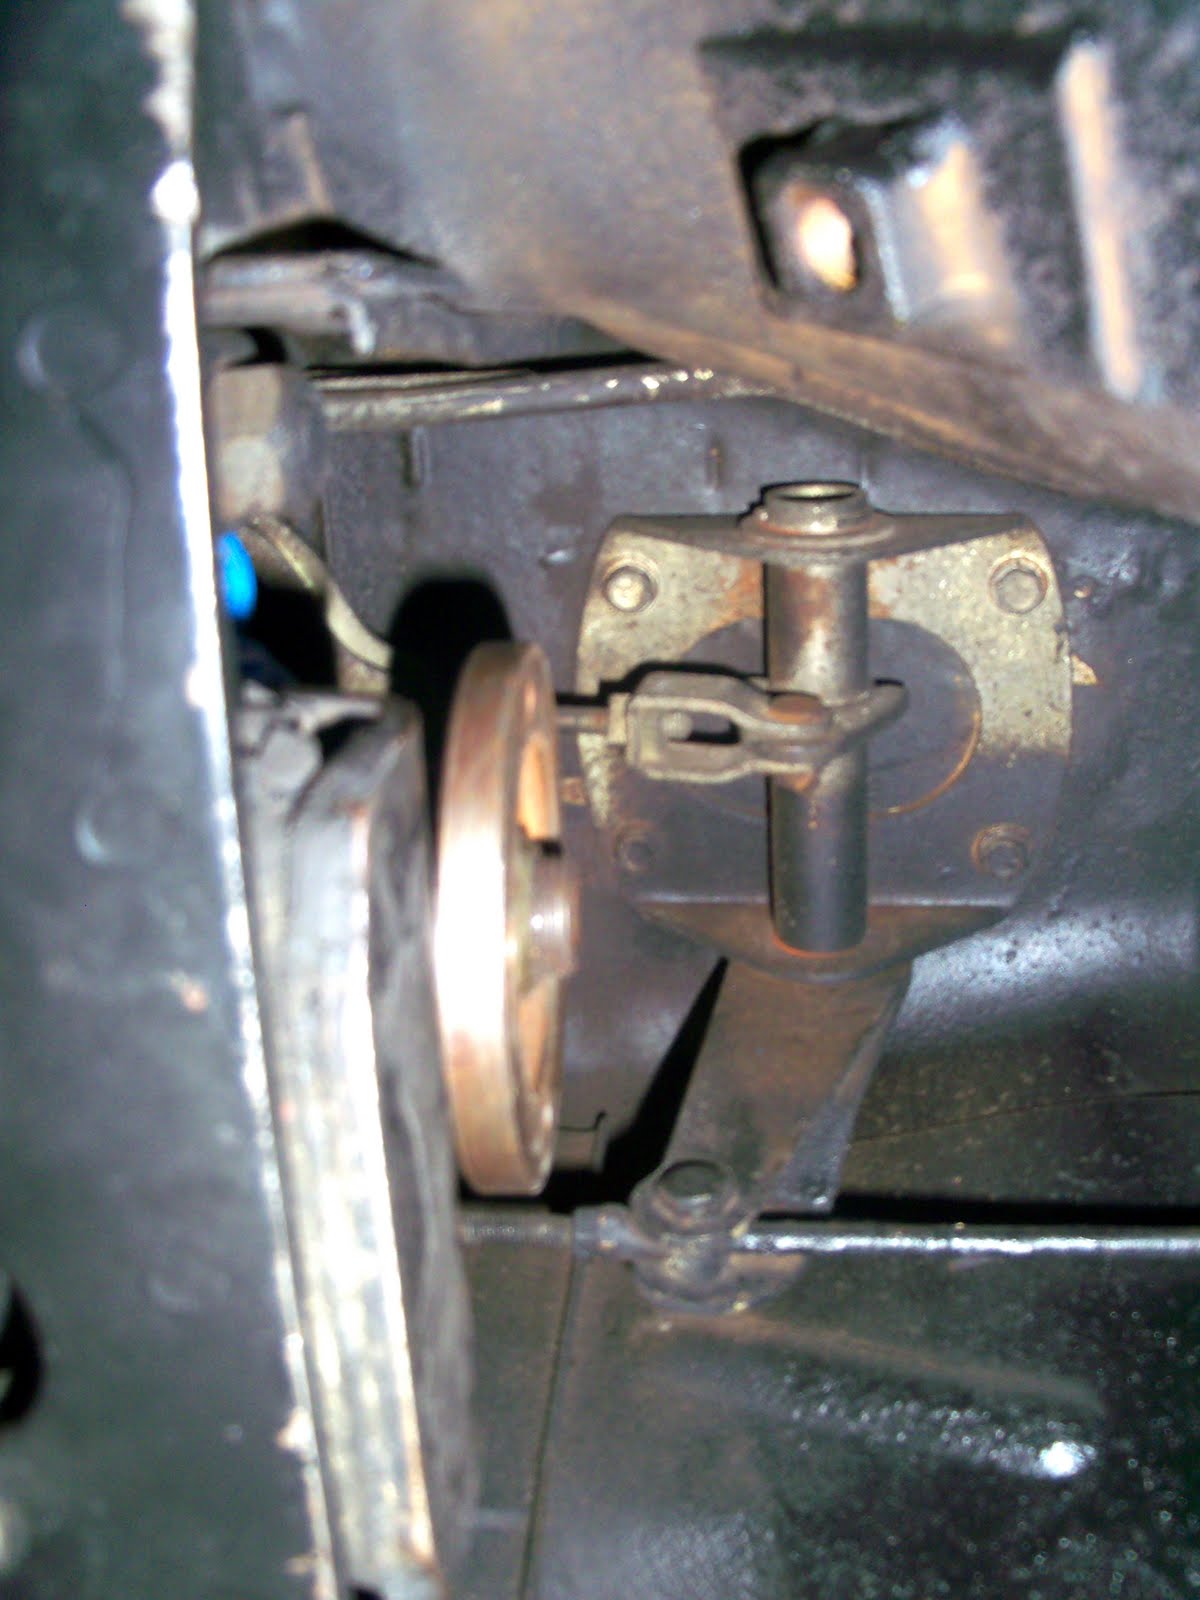
18. remove the passenger rear mount of the rear lower control arm (RLCA), to be replaced.

19. one of these threaded suspension mounting holes in the drop mount, to be replaced, may or may not have been stripped out and be 1/3 the reason for this entire disassembly.

2o. repeat on the driver side, note the dogbone cross bar, to be replaced, between the drop mounts that currently prevents the oem finned cover, to be added, from being used on my r2oo differential. the replacement dogbone will also have mounts for a rearward facing rear swaybar, to be added.

21. put the drop mount brackets and bolts in a relatively safe place, together, these actually are not being replaced if you can believe it.

22. remove the passenger side upper drop mount bolts, I promise both bolts were used, I took one out and took a picture, this is an in-between action shot.

23. repeat on the driver side, drop mount will be able to be removed later as it is still held in place indirectly by the front differential mount via the RLCA's.

24. front differential mount with (4) mounting bolts (outers), leave the (2) bolts in the center below the differential alone.

25. note the oem upper strap above the r2oo differential to be removed because the upper differential bolts and strap try to occupy the same place at the same time unsuccessfully.

26. differential to driveshaft joint.

27. remove drive shaft bolts and push driveshaft forward and out of the way, it can hang by the yoke if you don't want to remove it and roll it around the garage for someone to trip over. Sorry for the lack of picture of the relatively safe place that the driveshaft bolts were placed, together nonetheless.
28. ebrake assembly to be connected.

29. front differential flange.

3o. SUPPORT DIFFERENTIAL WITH JACK SO IT DOESN'T CRUSH SOMETHING VITAL TO YOU OR SOMEONE ELSE and remove the front mount chassis bolts, (2) bolt pairs on either side of the differential, each pair of which is on either side of opposing RLCA bushings, to be replaced by proxy.

31. there may or may not be a nut holding the differential to the mount itself, this is a 4o year old car, be prepared for it to drop unexpectedly if you forgot to check. if you are lucky enough to have a nut and not be surprised by this development, remove this as well or you will have to remove the differential with mount still bolted to it, possibly adding to its awkwardness.

32. RLCA's will drop away but are attached to the suspension columns which are still supported by the upper shock mounts.

33. once front differential mount is removed and RLCA's rotate down, the drop mount and dogbone will also fall out. catch it.

34. differential is now supported by jack and mustache bar, to be replaced.

35. aside from the obvious, one difference between these cv halfshafts and oem halfshafts is that you have to unbolt the RCLA's for removal, but remember the stack-up during disassembly because things like the differential are supported by the same mounts as the RCLA's.

36. remove the cv joint on the driver side from the suspension joint by rotating the suspension column outboard so that the cv joints can drop out, clearing the inner counterbore.

37. repeat on the passenger side.

38. last remaining mount holding the differential in, to be replaced by proxyness.

39. x2.

4o. remove the mustache bar nut, the lower washer will fall out unless you have an over abundance of grease still on it causing it to stick to the bushing above it.

41. repeat on the passenger side.

42. assembly of the differential, cv halfshafts, and mustache bar about to be pulled out. I've removed the differential from the mustache bar inside the car before, but that is difficult to maneuver as the differential must be moved with the jack forward enough to clear the rear casing studs without things slipping, hitting, or generally getting stuck.

43. carefully rock the differential back and forth, if you simply drop the jack, the differential may not come right off lowering with the jack as you may assume. I had to rock each side a bit at a time to work the mustache bar off the studs while lowering the jack a bit at a time. when the bar mount bushings are clear, lower the jack and pull the differential out. watch out for tangled ebrake lines and the many bolts you have put in relatively safe places, presumably together.

44. lower the jack all the way and untangle the cv halfshafts from the RLCA's as you pull the jack, and the differential assembly, reward.

45. assembly clear of hanging suspension columns.

46. mission accomplished.

47. space of void where the differential used to reside.

48. oem fuel pump, ebrake line, fuel lines, sub-frame, drop mount and mustache bar mount points

49. put in a relatively safe place, if you haven't run out of them yet.

5o. consider another coat of blue before reinstall.

51. oem front differential isolator, to be replaced.

52. time for bed, or blogging as the case may be.
No comments:
Post a Comment