I was fine with a non-adjustable suspension, but it seems my wide wheels weren't. In order to get as much tire under the stock fender as I could, I had to make up the difference on the inside. By replacing the stock (or aftermarket for that matter) suspension with a weld-in 2.5" coilover, the space is maximized. Anything more would require major modifications and at that point there wouldn't be a reason to keep the fenders either, which was the whole point of me changing out the suspension. Well, that and the wide, sticky rubber.
A nice side effect of the adjustable coilovers is the ability to lower the car as much as you can and be clean about it. In my mind, that used to be the whole point of expensive suspensions and I just never took the jump because of the un-needed cost. I was more apt to buy a standard spring and cut it than spend bukoo bucks on a fancy smancy adjustable coilover. In the spirit of being clean, if the car was to be lowered I was going to do it right. This also meant in order to get as much shock travel as possible, or should I say for the shocks to be of any use at all at a lowered height, I would be sectioning the shock casings. This wasn't that far of a stretch because the coilovers needed new weld-in lower perches anyways and it became a, "well, as long as your down there" situation.
Yet another choice to be made was for the many different lengths and rates of springs (to make up for the ease of there only being 1 manufacturer of high rate springs). Based on this guy's 240z SCCA car, 350/400# front/rear were possible (if not at the limits) on a 240z. Going along with function driving form, I needed traction, and my squatting in the rear wasn't helping the situation. In proper go big or go home fashion, I got the above springs rates at 8" lengths. Following Bart's suspension information, the 8" springs would be needed to clear the width of the wheels in the rear. This was very true, and I can only say how crazy the final fit is. In the rear, the tire curves between the lower sleeve perch and the lower spring perch, missing the perches and sleeve by mills in all directions. A 10" spring length at the same car height (nothing) would have pushed the lower perch into the tire diameter, forcing the tire, and subsequently wheel, to have to be moved outboard by at least 1/2". Rockstar.
It turns out that the shortest shocks you can get for a 240z are also adjustable. Most Z guys use a different set of Tokico Illumina PN shocks (BZ3099 and BZ3015) than I did (BZ3125 and BZ3038), but from all my research I think they have the same body lengths. I think the difference is in the upper shaft mount diameter, right below the threads of the shaft. There are many shock sectioning threads, 2 just on Hybridz (one covering why and how and one with many pictures), so I'm not going to get into super detail, only to say that I sectioned by simply measuring the distance of overlap of the casing after cutting with respect to the shocks I was now using. Also make sure to see my fellow blogger Alex's latest 240z post doing the exact same thing on his 240z. It seems to be going around and I'm always a day late.
It's good to check all fitments BEFORE you cut/weld/install things, this includes the fitmet of the shocks to the camber plates. Note the shock thread alignment above, I was a bit worried about this AFTER installation, but Gabe calmed me down to reality, reminding me about the specialty shoulder sleeve nuts that came w/ his camber plate kit. They happen to be the correct threading for the rear ID/OD of the spec'd shock and camber plate swivel bearing respectively, go figure. This centers the rear shock while creates a nice slip fit between it and the swivel bearing. The front uses a 15 mil sleeve between the shock OD just below the threading and the swivel bearing and the standard Tokico nut.
All you have to do to get to this point is the following:
- cut the shock housing in a position that will be covered by the coilover sleeve (not required, but aesthetically pleasing none-the-less; and as a side note, I cut mine exactly where the lower perch was, don't ask me why, which fell perfectly under the 7" threaded sleeves)
- insert the shock into the lower shock casing and mark where you cut the casing on the shock
- pull the shock out
- thread the gland nut all the way onto the upper part of the shock casing
- insert the shock into the upper shock casing (with the washer in place) and mark where you cut the casing on the shock
- measure the distance between the 2 marks and this is how much to remove from the overall casing length.
This washer was my first buffer, if I were to cut too much off in the wrong direction, I could always remove the washer. The second buffer was the gland nut threads. In step 4 above I threaded the gland nut on ALL the way to the rim. Minus a thread or 2 would have been fine, but in all reality this isn't a buffer to count on. The gland nut should bottom out on the shock within it's torque limit without bottoming out on the threads anyways. Since I don't know many people with torque wrenches attached to their pipe wrenches, this doesn't exactly come into play, but just something to think about when cutting, welding, and test fitting using the threaded on gland nut.
The lower perch is easy, simply turn it so the flat part is facing inboard to clear the tire better and place it so that the threaded sleeve from the coilover sits just below the top of the shock casing after sectioning. I measured 1/8" from the top, some came closer, but this isn't critical (see the note for step 1 above). Depending on which way you flip the sleeve you can pull it up a bit over the gland nut after installation, or not. If you install them this way (which I didn't because of my uncannily perfect measuring/cutting ability), it will make up for a pearch welded a scoche too high, but the sleeve (and subsequently lower adjustable spring perch) will float when the suspension is at full droop. This is only a real issue if you plan on going off any sweet jumps, but just something else to consider as well as spring helpers/limiters, again, something I did not use.
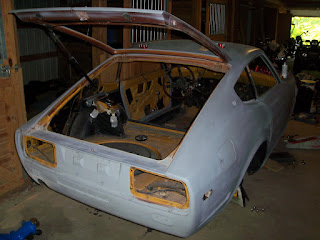
My MIG welds are definitely nothing to look at, strong as they may be, and I wanted to keep this shell as special as I found her. As reluctant as I was cutting and welding anything on her, it was a very hard choice, but TIG welding was the only way to go. I found a local welder with a flexible schedule who would listen to my list of weird questions and requirements to do the trick. Tony is a great guy, an amazing welder, and, as it turns out, an owner of (2) s30's (rare) with under 30k miles on them (incredibly rare). He informed me it wouldn't be good to grind down TIG welds but that I wouldn't even have to when referring to the sectioning weld below the threaded sleeve. He was right. The welds were flawless, not even above the OD surface of the tube. It took about 5 hours minus some brakes and talking about Z interior choices (or my apparent lack there of).
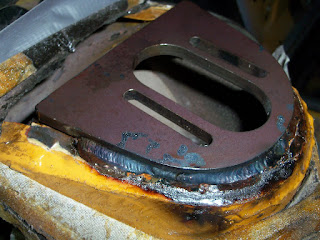
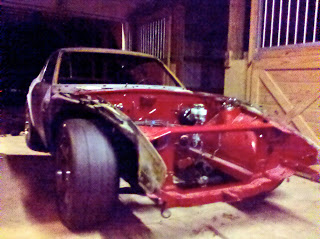
Make sure to align the camber plates with a straight edge and not to the fenders. This creates a bit of a gap between the rear part of the outboard weld between the plate and the fender in the front, but it is fine, simply weld as much as you can. As you can see, I also did not bend my front camber plates as some website installs show people doing. I did be best to heat up and bend the 1/4" plate steel plate the night before but failed miserably. I was worried about having to bend it so close to the precision machined swivel bearing slots, but it didn't matter, I couldn't budge it. Installing the flat plate as such created a small gap where the body line of the suspension tower drops away in the front, but considering the other small un-welded gap areas, it looks like it belongs. Trimming of the hood seam may be required to clear it in the future, but as far as letting everything hang out, it's a success, and I refuse to paint over it with anything but clear coat. The tack welds on the plates were probably strong enough to hold her in place for good, everything else is a bonus, raw and beautiful.


Nice fit!
ReplyDeleteClear over raw ftw.
Wittle kitty made a cameo with the shocks!
ReplyDelete