
Pulling the engine, again.

I attached the load leveler for the hoist to the correct spark plug coil pack mounts using a longer set of bolts to go through the last link of the chain as well. The washers ended up bending a bit after all was said and done, next time I may get stronger washers.


When the coilovers are set at ride height, the engine hoist will not fit under the suspension's front control arms. I had to put the car back up on jack stands in order to pull the engine. I made sure to set the stands on the lowest settings to minimize the height at which the hoist would have to end up at in order for the engine to clear the car for removal.
As seen later, I wish my stands were an inch shorter, or maybe the garage taller, or at the very lease, the light fixture not DIRECTLY above the hoist.


The jack barely fits under the engine cross member center jack point, and depending on the suspension settings or the thickness of the block of wood I used between the two, I have to lift the body up a bit and push the jack under it. Yes, it's light enough.


From past experience, MAKE SURE to remove the shifter BEFORE starting the engine removal process. It's no fun at all to realize the shifter was left in when you are half way through an engine pull and have to either remove the shifter from under the car while it is pushed against the bottom of the transmission tunnel, or re-install the engine so that the shifter can be pulled from the hole.


With the engine is installed as it is now, further back from the previous install, the speedo sensor hits the flat face of the car side transmission mount directly above the bolt hole. The driver side of the car is similar in that the transmission itself hits the car side mount as well. For both sides, a relief had to be cut to give the transmission some wiggle room while driving, yet another reason for the engine removal.


Here's a shot of some of the paint scraping that occurred during the last installation. This is what happens when you are doing it by yourself, exhausted, in the middle of the night. I wanted to sand the edges down and seal it and needed to remove the engine to do so.

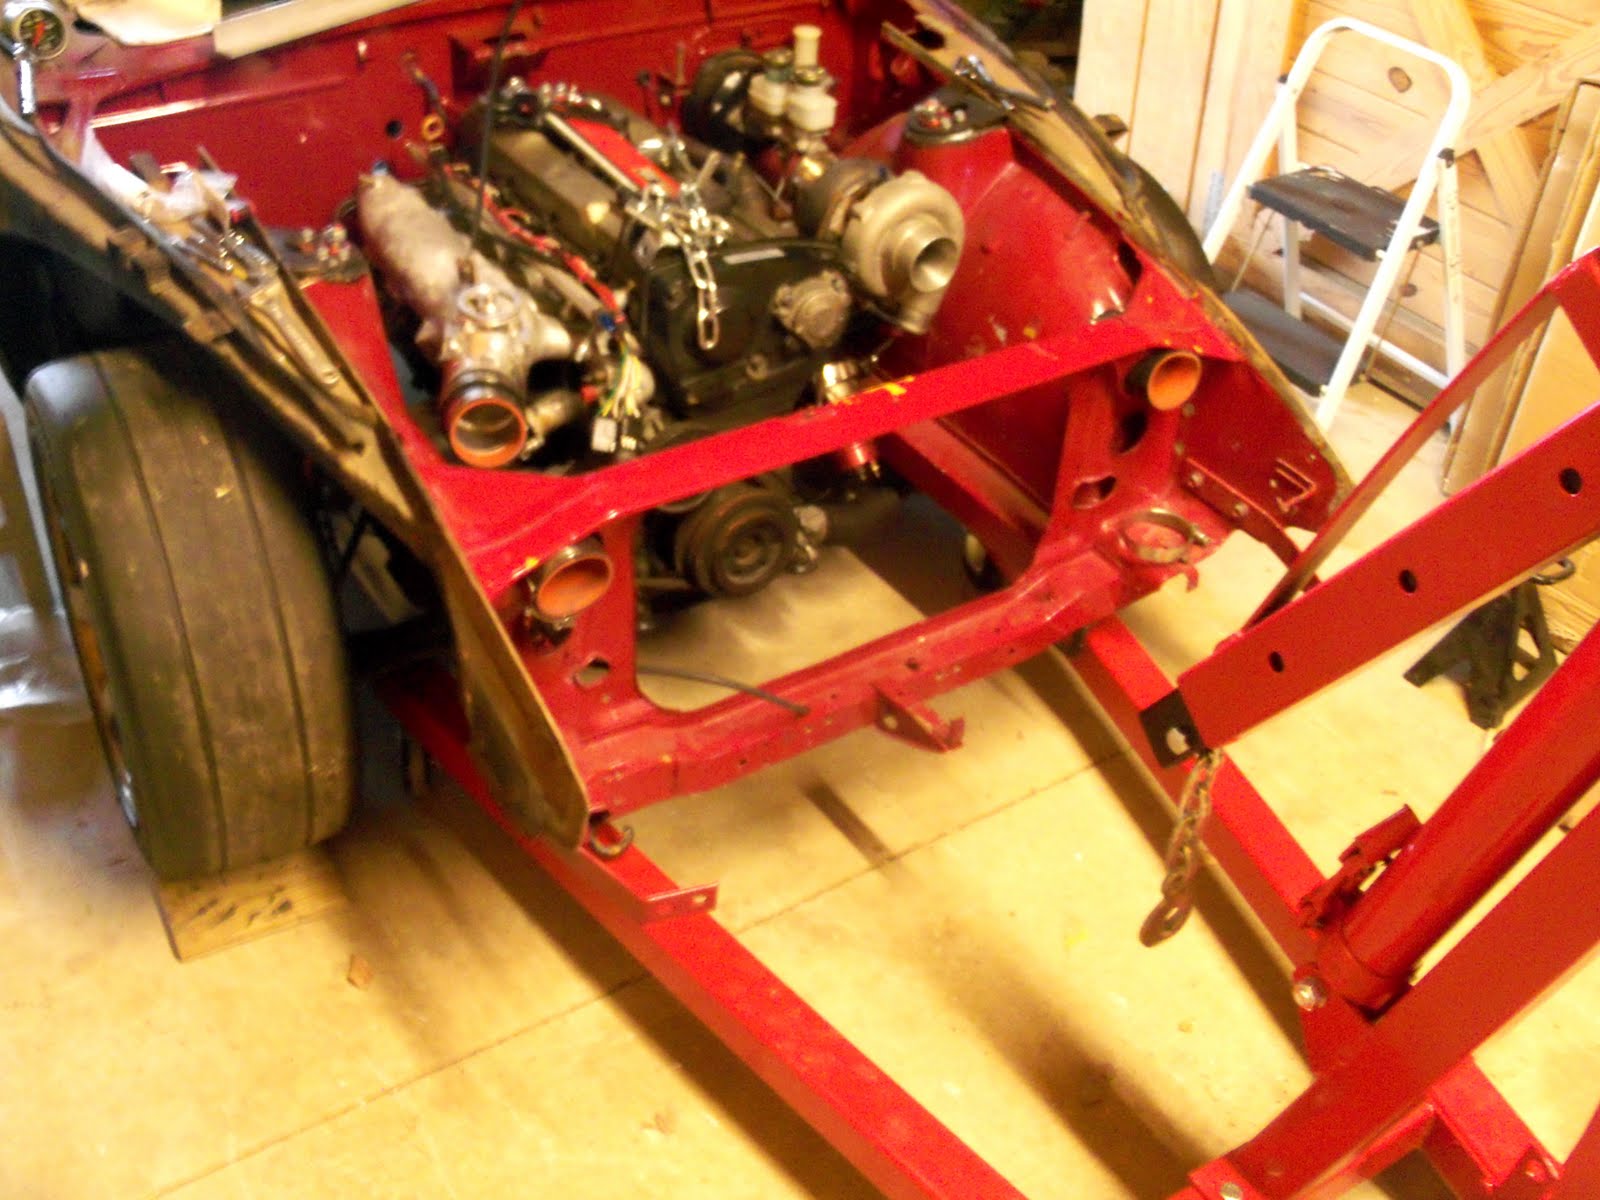
A few hours later - bam.


Check out ALL the oem fuel lines, brake lines, clutch lines, and tank vent lines which are all held in place by ALL the oem brackets.

Again, some victory shots after a hard morning.


Here's whats left of one of the fluorescent lights that used to be right above where the car is parked. I had to max out the height of the hoist on it's longest boom setting in order to get the engine high enough at the correct angle for everything to clear. The light was an inch too low in just the wrong place as I pulled the hoist back around the light fixture.
Long fluorescent light 0, Engine hoist 1.


I attached the load leveler for the hoist to the correct spark plug coil pack mounts using a longer set of bolts to go through the last link of the chain as well. The washers ended up bending a bit after all was said and done, next time I may get stronger washers.


When the coilovers are set at ride height, the engine hoist will not fit under the suspension's front control arms. I had to put the car back up on jack stands in order to pull the engine. I made sure to set the stands on the lowest settings to minimize the height at which the hoist would have to end up at in order for the engine to clear the car for removal.
As seen later, I wish my stands were an inch shorter, or maybe the garage taller, or at the very lease, the light fixture not DIRECTLY above the hoist.


The jack barely fits under the engine cross member center jack point, and depending on the suspension settings or the thickness of the block of wood I used between the two, I have to lift the body up a bit and push the jack under it. Yes, it's light enough.


From past experience, MAKE SURE to remove the shifter BEFORE starting the engine removal process. It's no fun at all to realize the shifter was left in when you are half way through an engine pull and have to either remove the shifter from under the car while it is pushed against the bottom of the transmission tunnel, or re-install the engine so that the shifter can be pulled from the hole.


With the engine is installed as it is now, further back from the previous install, the speedo sensor hits the flat face of the car side transmission mount directly above the bolt hole. The driver side of the car is similar in that the transmission itself hits the car side mount as well. For both sides, a relief had to be cut to give the transmission some wiggle room while driving, yet another reason for the engine removal.


Here's a shot of some of the paint scraping that occurred during the last installation. This is what happens when you are doing it by yourself, exhausted, in the middle of the night. I wanted to sand the edges down and seal it and needed to remove the engine to do so.

A few hours later - bam.


Check out ALL the oem fuel lines, brake lines, clutch lines, and tank vent lines which are all held in place by ALL the oem brackets.

Again, some victory shots after a hard morning.


Here's whats left of one of the fluorescent lights that used to be right above where the car is parked. I had to max out the height of the hoist on it's longest boom setting in order to get the engine high enough at the correct angle for everything to clear. The light was an inch too low in just the wrong place as I pulled the hoist back around the light fixture.
Long fluorescent light 0, Engine hoist 1.


I went back out later and took some pictures with my cell phone. You can see the lack of room between the light and the hoist that would soon be a minor issue. As a side note, I used Picasa to edit these photos instead of the auto-edit feature of iPhoto. I think they came out a bit better, but took 1o times longer to edit. I still attest it would be easier with a better camera.


